Vscode tips for flutter
Introduction
VSCode has many features and extensions to make your Flutter Project development process much easier, neat, and fun. In this article we are going to explore the tips & tricks that I use in all of my projects.
Add Flutter UI Guidelines
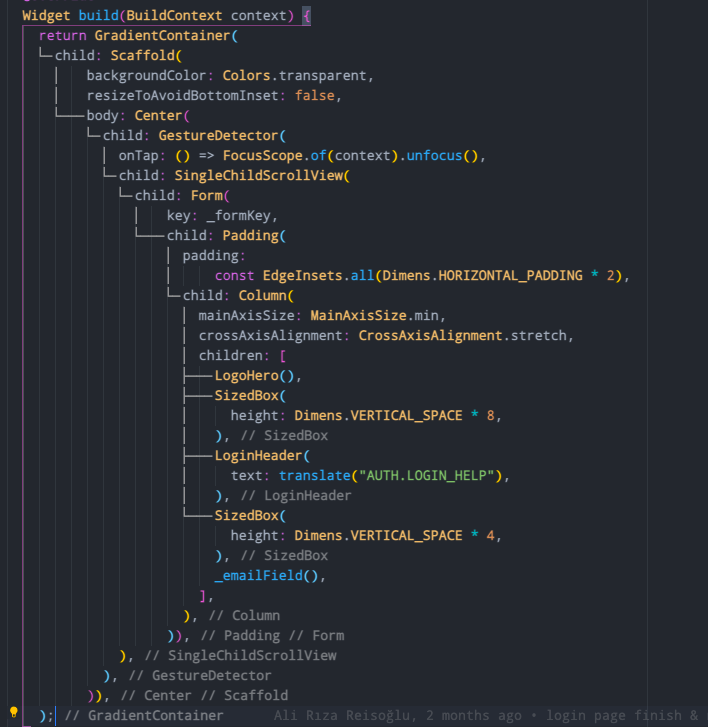
This built-in VSCode feature will give your Dart code a tree-like view. When the feature is turned on, it draws an indentation line from the parent widget to its child or its children that increases the readability of the code drastically while building a UI Widget tree.
To implement it, simply go to VSCode settings and search for
Dart:Preview Flutter Ui Guides
and check its box.
Duplicate a section without copy & paste
A much faster way than copying and pasting a section for multiple purposes is duplicating it with the VSCode shortcut.
Select the lines to duplicate, press ‘option + shift + down or up arrow key’ (Shift+Alt + ↓ / ↑ in Windows) to create the same section right under the original one.
Use Quick Fix
The Quick Fix options are a lifesaver when you know when and where to use it.
Let’s run through from the most common use cases to the least known ones.
- Wrap the widget with another Widget
- Wrap the widget with Center
- Wrap the widget with Container
- Wrap the widget with Padding
- Wrap the widget with StreamBuilder
- Extract the widget as a local variable
- Extract the widget as a Custom Widget
Please note that some options in this example come with BloC package, if you do not see all of it do not worry at all.
- Wrap the widget with Column
- Wrap the widget with Row
- Extract the widget as a local method
It can also be used to wrap the widget or widgets with a Stack widget. Just wrap the widget with a Column or a Row, then rename it to Stack.
Important thing is to exclude the trailing comma at the end of the widget if you successfully like to extract the widget as a local method.
Bonus: If you have Dart Data Class Generator extension you can also generate JSON model of the classes easily.
A pretty straightforward but really useful tip to convert any normal function into async function in an instant.
In normal function, after you specify await, hit the Quick Fix icon and press ‘add async modifier’ and Voilà.
See the dependency Chain of a Specific Package
This brand-new feature has been introduced by VSCode Dart & Flutter extension, and it helps you to see the shortest path to the dependency. It works similarly like the command dart pub deps where you see the chain of all dependencies.
To use this feature, open up the dependencies tab in your project and hover into a dependency that you would like to see its path.
See errors faster with Error Lens
How convenient would it be to see the error right where it actually occurs? I guess it would be super convenient and this extension highlights the errors in your code on its original line.
Installing the extension will be more than enough to show the errors and no more adjustment is required.
Add packages inside the VSCode with Pubspec Assist
It is as fast as your typing speed to add dependencies and packages to your project by the help of this extension.
Install __’Pubspec Assist’ extension to VSCode, press ‘cmd + shift + p’ (or ctrl + shift + p on Windows) to bring up the command menu and either choose to add dependencies or dev dependencies to pubspec.yaml.
Once you type the name of the library, if the name perfectly fits the library is installed immediately, or if the name is closer to the actual package name, the extension will show all the related packages to choose from.
Android IOS Emulator Extension
With this extension, it is extremely fast to fire up your emulator of choice and start debugging immediately.
Install ‘Android IOS Emulator’ extension. Specify the path of your emulator into the settings and that’s it.
Default: "emulator.emulatorPath": "~/Library/Android/sdk/emulator" Mac: "emulator.emulatorPathMac": "~/Library/Android/sdk/emulator" Linux: "emulator.emulatorPathLinux": "~/Android/Sdk/emulator" Windows: "emulator.emulatorPathWindows": "<yourAndroidHome>\\Sdk\\emulator\\emulator.exe" or "C:\\Users\\<yourUsername>\\AppData\\Local\\Android\\Sdk\\emulator\\emulator.exe"
An emulator icon will appear after the installation. Pressing on it will reveal all the available emulator options.
Please note that in order to Android emulator, you still need Android Studio and for IOS emulator you need XCode installed.
Start Build Runner on Status Bar
This one is for easier code generation. If you use code generation frequently in your projects, then you can generate and watch generated code with one click.
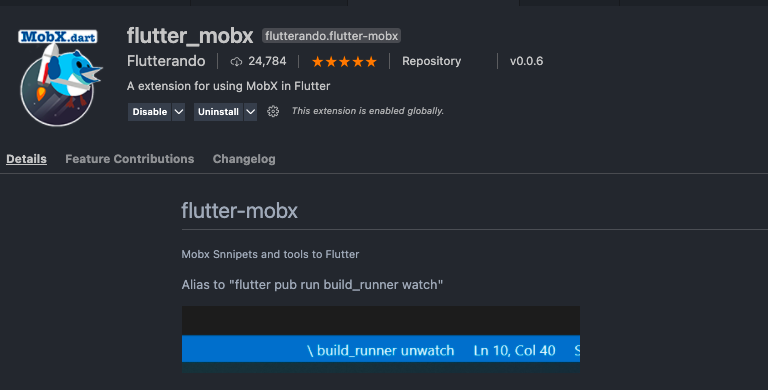
The original extension is called ‘flutter_mobx’ and it has awesome snippets and features for MobX state management, however you can even use it for only it’s build_runner button.
All you need to do is to search and download for ‘flutter_mobx’ and the button will appear automatically down in your status bar.
After installation, a simple click on it will generate the code after couple of seconds.
In the end the best tip would be to use the feature or package that feels the most natural. These things are out there to make your development process easier and faster, if any of the tips are going to help you out in this context, then I would be more than content. Happy coding, and please reach out to me if you have any other suggestions.


